Very occasionally someone will ask me something about the simple task of photographing moving subjects that makes me think they’re making more of it than there really is. The odd add-on to that is, no-one’s ever asked me exactly how to do it. Obviously there are many possible reasons for this, but just in case the main one is fear of appearing silly, here’s my complicated guide to that simple task. Of course the other reason is that it’s blindingly obvious and/or no-one sees this as a viable career option anyway.
Set focus mode to auto and continuous, or servo if your camera uses daft words, and set focus point selection to single point and choose the middle one. Set frame advance to single for now. Make sure that autofocus is activated by half-pressing the shutter button (some cameras have the option to turn that off and assign focus activation to a different button), and practice this sequence on a stationary subject: Plant focus point on target, half-press the shutter button, wait a second, squeeze to take a shot and let go. Get used to being able to release the shutter at the exact moment you’re expecting, and then practice it some more. When you’re happy, set frame advance to continuous and practice shooting three frames at a time. With faster cameras this will take a bit of practice, so if you’ve got a choice maybe set it to six frames per second.
Enjoy more Fast Bikes Magazine reading every month.
Click here to subscribe & save.
Now you need a moving target. Shooting cars from a bridge over a fast road is a good start. Now the drill goes: select target vehicle, decide what the critical point on your target vehicle is (see below), plant focus point on critical point and keep it there for a few seconds – during which you’ll have half-pressed the shutter button, waited a second, and squeezed to shoot your three frames – then stop. When you’ve practiced this enough, or realised you were already awesome, the focus point will still be on your chosen critical point after you’ve shot the three frames.
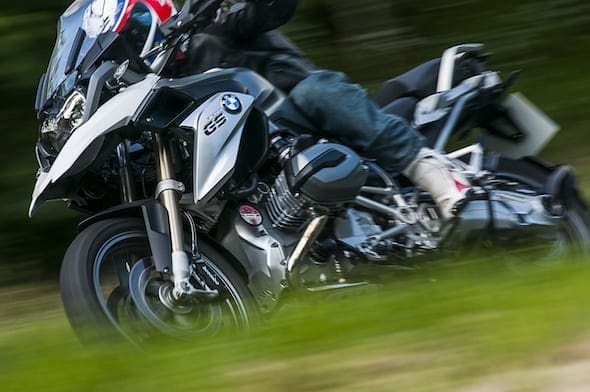
Choosing the critical point on your subject is usually pretty straightforward. It has to be something that your focus sensor can, er, sense. Also it has to be kind of in the middle of the area that you want to be sharp in your picture. So in the rubbish picture above, it’s on the ‘G’ of the bike logo. I chose this picture because it was shot at a slow enough shutter speed to show the area of sharpness around the critical point; by the time you get to the helmet, the bottom of the fork leg, and the boot, it’s all getting a bit blurry. You’ll notice I selected the camera’s focus point up-and-left of the centre point, which is the last piece of that puzzle. Once you’ve decided where your subject’s critical point is, you can choose where in your picture to put it by moving the camera’s focus point around the viewfinder.
Once you’ve sorted that lot out, shutter speed selection is what makes the most difference. 1/500th-of-a-second (“500″) is about right for nearly everything if you’ve been practicing, 640 is more reliable, and at 800 or 1000 you should be getting them nearly all perfect but by then you’re into the realms of freezing all the motion anyway. 250 is for when you’re feeling particularly awesome or you know you’ll get twenty goes at it and you only need one good one. 100 and below is for boring cars but also works for bikes if you’re shooting them upright and side-on.
Get all the above more right than wrong and you’ll either have found it more tedious than fun, or you’ll be wondering whether it just might be a viable career option. Oddly, no-one’s ever asked me that either.
Jonny Gawler